iGlucose - Performing a blood glucose test
Below you will find the detailed process on how to perform a blood glucose test. The process is broken down in the following steps:
- What you will need before testing
- Preliminary steps before testing
- Preparing the lancing device
- Inserting the test strip
- Applying a blood sample
- Removing the used lancet
- Removing the iGlucose blood glucose test strip
- Important notes
What you will need before testing:
- The iGlucose Blood Glucose Meter
- iGlucose Blood Glucose Test Strips
Note: Do not use expired test strips. Please check the expiration date on the test strip vial before beginning a test. - iGlucose Lancing Device
- A sterile lancet
Preliminary steps before testing:
- Wash your hands thoroughly with soap and water and dry well.
- Set your blood testing mode to “Before Meal” or “After Meal” by turning the meter on (pressing and holding the “Home” button). Press the “Home” button to get to the desired ”Before Meal” or “After Meal” icon on the screen. See more about this setting here.
- Take one iGlucose Blood Glucose Test Strip from the vial. Close the vial cap immediately.
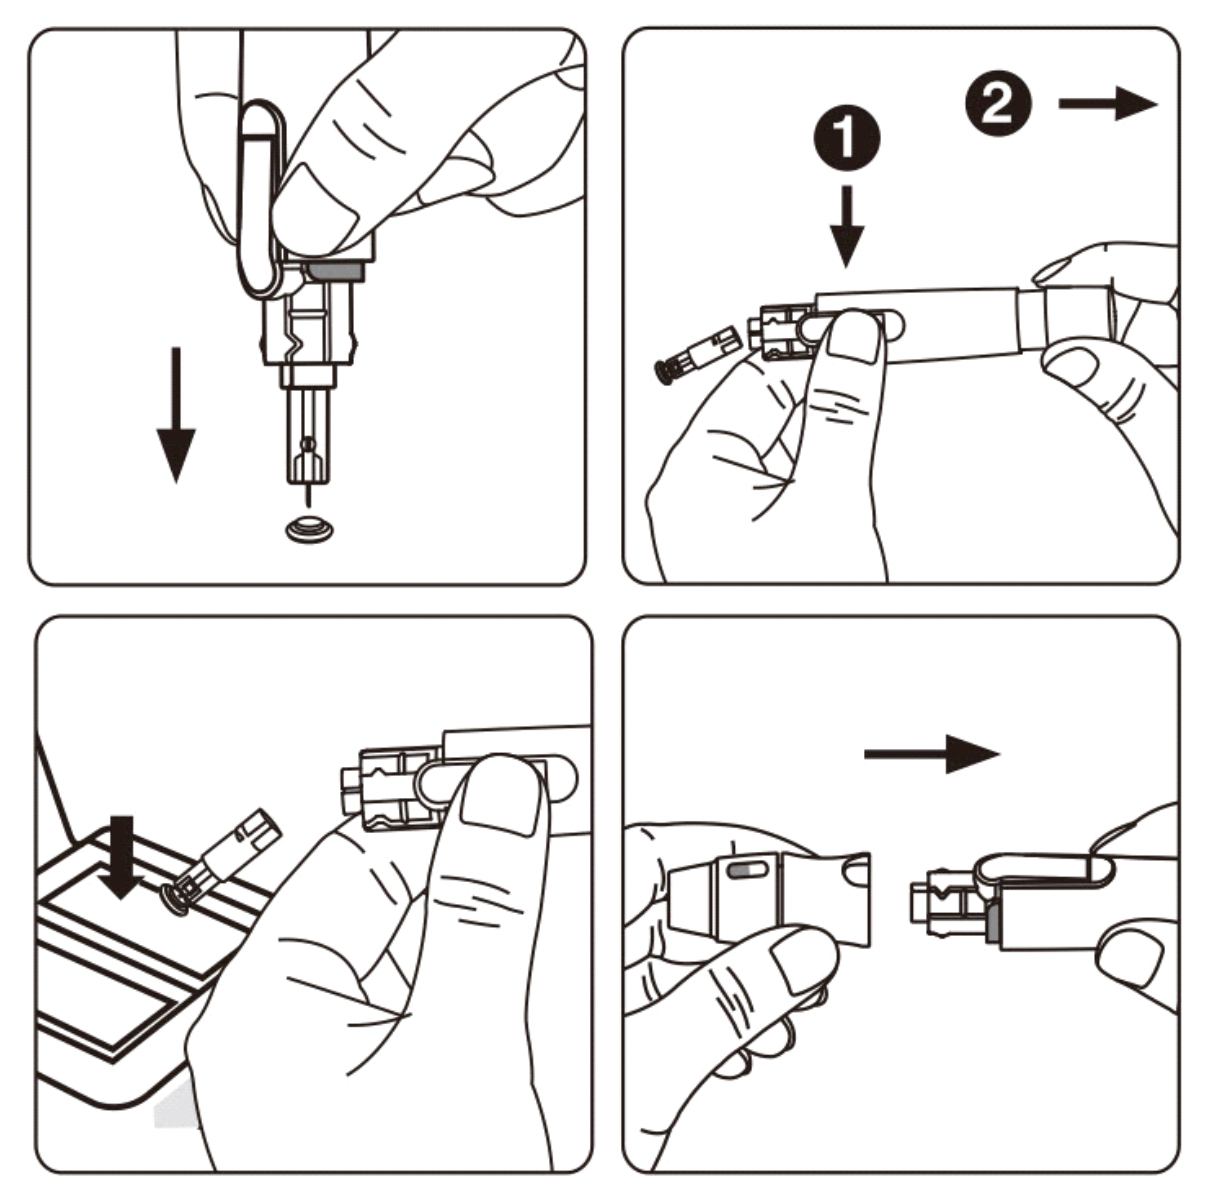
- Hold the adjustable depth cap of the lancing device in one hand while holding the base in the other hand. Slightly force downward to separate the two parts. Please see drawing below.
- Pull the two parts in opposite directions to remove the adjustable depth cap.
- Insert a new disposable lancet firmly into lancing device.
- Twist off and set aside the protective cover of the disposable lancet. This round piece will be used later to dispose of the used lancet.
- Replace the depth adjustable cap firmly.
- Choose a depth of penetration by rotating the top portion of the depth adjustable cap until your desired setting is visible in the window.
Settings are based on skin type: for soft or thin skin;
 for average skin;
 for thick or calloused skin.
 - Prepare (pull back) the lancing device for a finger stick by holding the base of the lancing device in one hand and pulling on the plunger with the other hand.
The device will be prepared/cocked. Release the plunger and it will automatically move back to its original position near the base.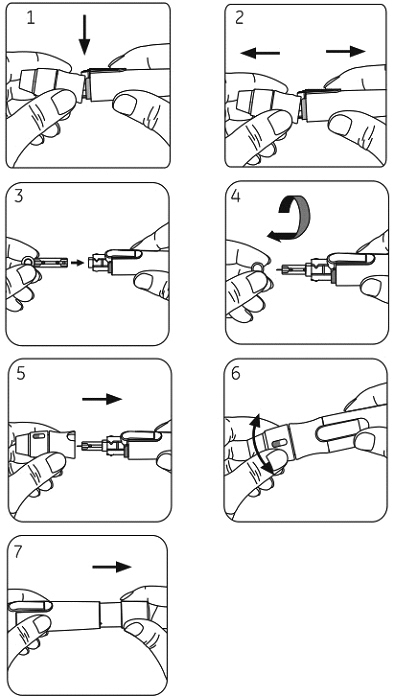
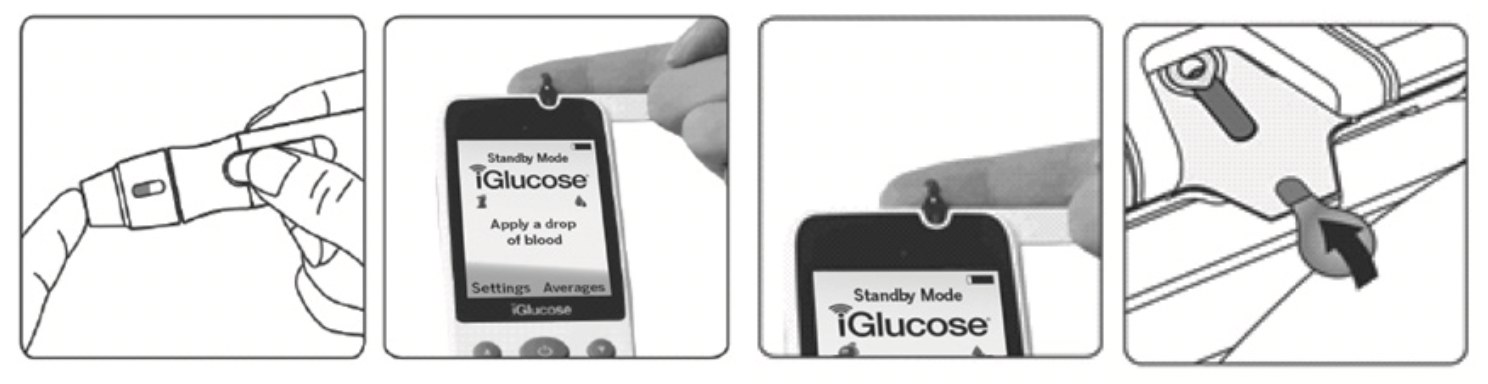
- Hold the iGlucose Test Strip between your thumb and middle finger with the view window facing you (dark side of the sample port facing you).
- Put your forefinger on the side of the strip as shown.
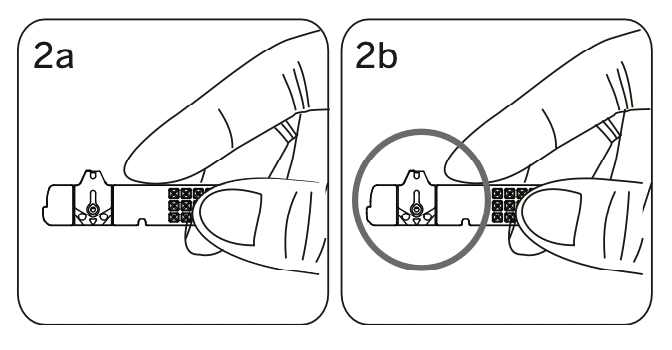
- Insert the iGlucose Test Strip into the test strip port straight downwards with the strip view window facing you until it clicks and firmly stops.
Note: If in Standby Mode, your meter will automatically turn on once the strip is inserted and the message “Strip Inserted” will be displayed.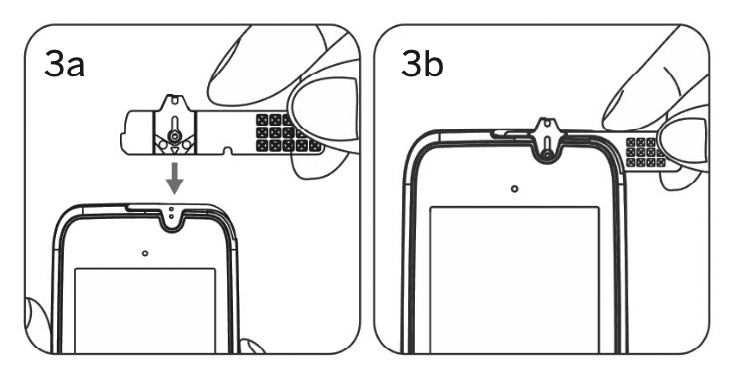
- The meter goes through an internal check that takes 3 seconds.
Wait until a blood drop icon and “Apply a drop of blood” message appears on the display window.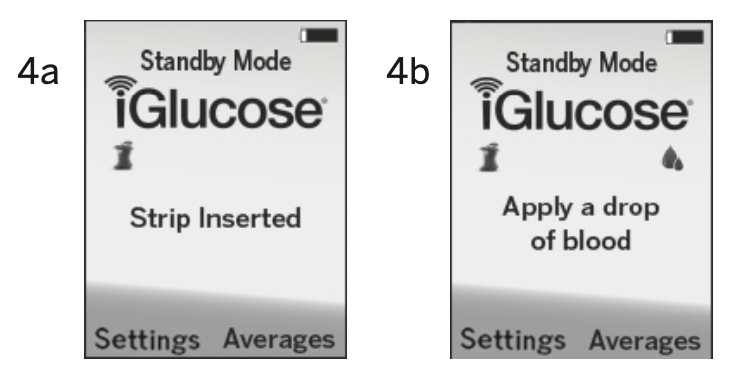
- Apply the blood sample within 120 seconds of the message appearing.
- Place the lancing device against your fingertip and press the release button as indicated in the drawing below. The blood sample should come out by gently squeezing.
- Touch and hold the blood drop to the edge of sample port until the view window is filled with blood.
Note: If the view window is not completely filled with blood the test will not start. Discard the used test strip and repeat with a new iGlucose Test Strip. - The meter will now count down from 5 to 0 and will display your blood glucose result.
Note: A “No Service” message may appear which does not impact the meter’s function. It means that the cellular service has not made a connection. The glucose result will still be displayed and will still get recorded in the system’s memory.
- Pull off the depth adjustable cap.
- Locate the protective lancet cover and place it on a flat surface.
- Without touching the used disposable lancet, securely insert the sharp lancet tip into the protective lancet cover. See drawing below.
- Hold the release button of the lancing device in one hand and pull on the plunger with the other hand to safely eject the used disposable lancet. See drawing below.
- Discard the used disposable lancet into a “Sharps” container.
- Clean and disinfect the lancing device.
- Replace the depth adjustable cap after finishing the test.
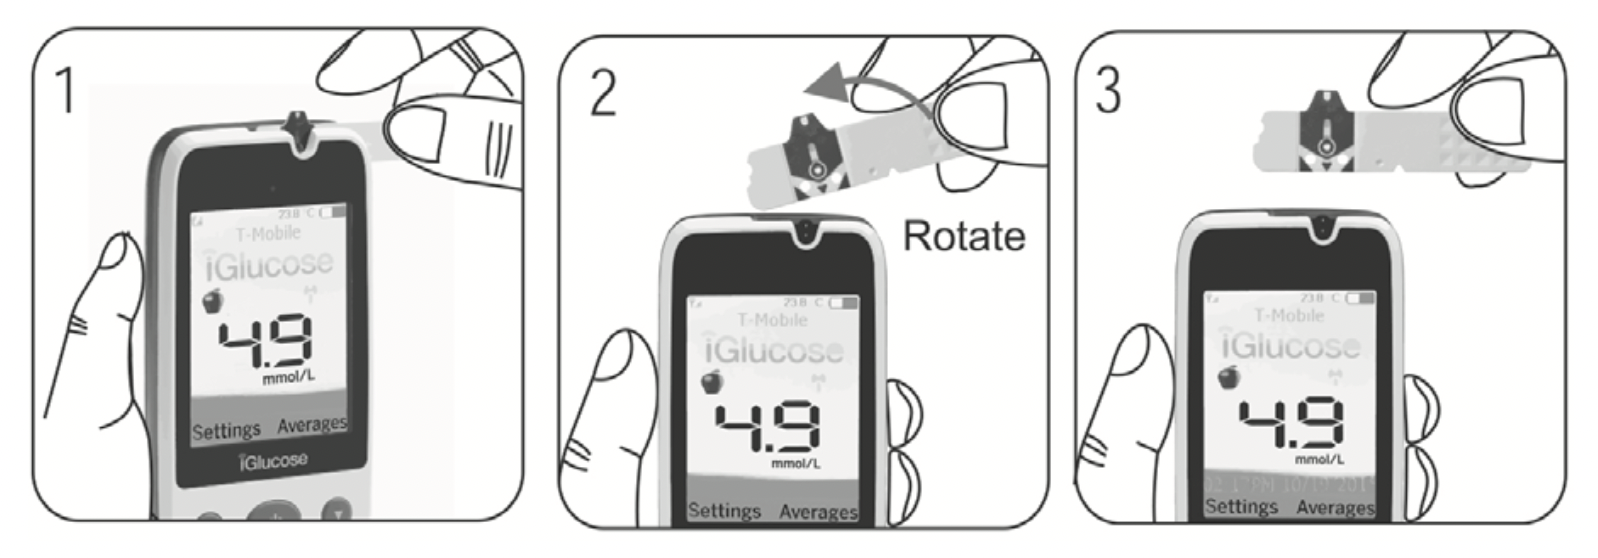
Removing the iGlucose blood glucose test strip
- Hold the test strip by its right edge as shown.
- Rotate the test strip upwards (counterclockwise) and pull up simultaneously.
- Take the test strip out of the test strip port.
- Please follow your healthcare professional’s instructions and discard used strips properly.
- Healthcare professionals should evaluate their patients’ technique regarding the use of the iGlucose Blood Glucose Monitoring System regularly. To accomplish this, it is recommended that blood glucose monitoring results be compared with a concurrently obtained laboratory measurement on the same blood sample. A proven clinical laboratory method employing hexokinase or glucose oxidase should be used as the comparative method.
- Like all commercially available blood glucose meters, your iGlucose® Blood Glucose Meter result may vary slightly from your actual blood glucose value. This may be due to slight differences in technique and the natural variation in the test technology. The table below shows the results of a study where 153 typical users used the iGlucose Meter to test their blood glucose level. When glucose results were 4.0 mmol/L, the iGlucose Meter gave results below 0.826 mmol/L of their true blood glucose level 6 out of 6 times.